MORE PERFECT SPIRAL
일반적인 3D 프린팅은 물체를 한 층씩 만들어 나간다. 이 때 각 층의 시작점과 끝점이 만나는 지점을 'Z심(Z Seam, 이하 심)'이라고 부른다. 이 심은 매끈한 표면에서 두드러지게 나타나며 이를 최소화하기 위해 캘리브레이션으로 심의 크기를 줄이거나 퍼지스킨을 활용하여 심의 형상을 숨기기도 한다.
이 외에도 스파이럴 모드를 활용하여 심 자체를 없애는 방법이 있다. 이는 내부 채움을 없애고 외벽을 한 개로 만들어 단일 연속선을 프린팅하는 기능으로 외부 윤곽선을 나선형으로 만들어 심을 없애준다다. 모델링에 구멍이나 간격이 없이 연속적인 단면을 갖는 꽃병 같은 형태에 적용할 수 있으며 프루사 슬라이서나 큐라와 같은 대표적인 슬라이서 프로그램에서 이 기능을 제공한다.
슬라이서 프로그램으로 이 기능을 구현할 때, 일반적인 0.4mm 구경의 노즐을 사용하면 큰 문제점이 없지만 이보다 큰 노즐을 사용할 경우 적층 결이 두드러지게 보이게 되어 각 슬라이서별로 한계점이 뚜렷하게 나타난다다. 각 슬라이서마다 스파이럴 모드의 구현 방식은 차이점이 있으며, 원통형의 모델링을 동일한 조건으로 출력하였고 출력물과 그 특징을 도식화한 이미지는 아래와 같다.
In general, 3D printing creates an object layer by layer. The point where the start and end of each layer meet is called the 'Z Seam(hereafter referred to as the Seam)'. This seam becomes prominent on smooth surfaces, and to minimize it, calibration can be used to reduce the size of the seam or fuzzy skin can be employed to hide the shape of the seam.
Additionally, there is a method to eliminate the seam altogether by using spiral mode. This mode removes infill and prints a single outer wall in a continuous line, creating a spiral-shaped external contour that eliminates the seam. It can be applied to vase-like shapes with continuous cross-sections without any holes or gaps. This feature is available in major slicing programs such as PrusaSlicer and Cura.
When implementing this feature with slicer programs, using a standard 0.4mm nozzle generally presents no significant issues. However, when using a larger nozzle, the layer lines become more pronounced, making the limitations of each slicer more apparent. Each slicer has a different implementation of spiral mode. A cylindrical model was printed under the same conditions for comparison, and the printed results and their characteristics are illustrated in the image below.
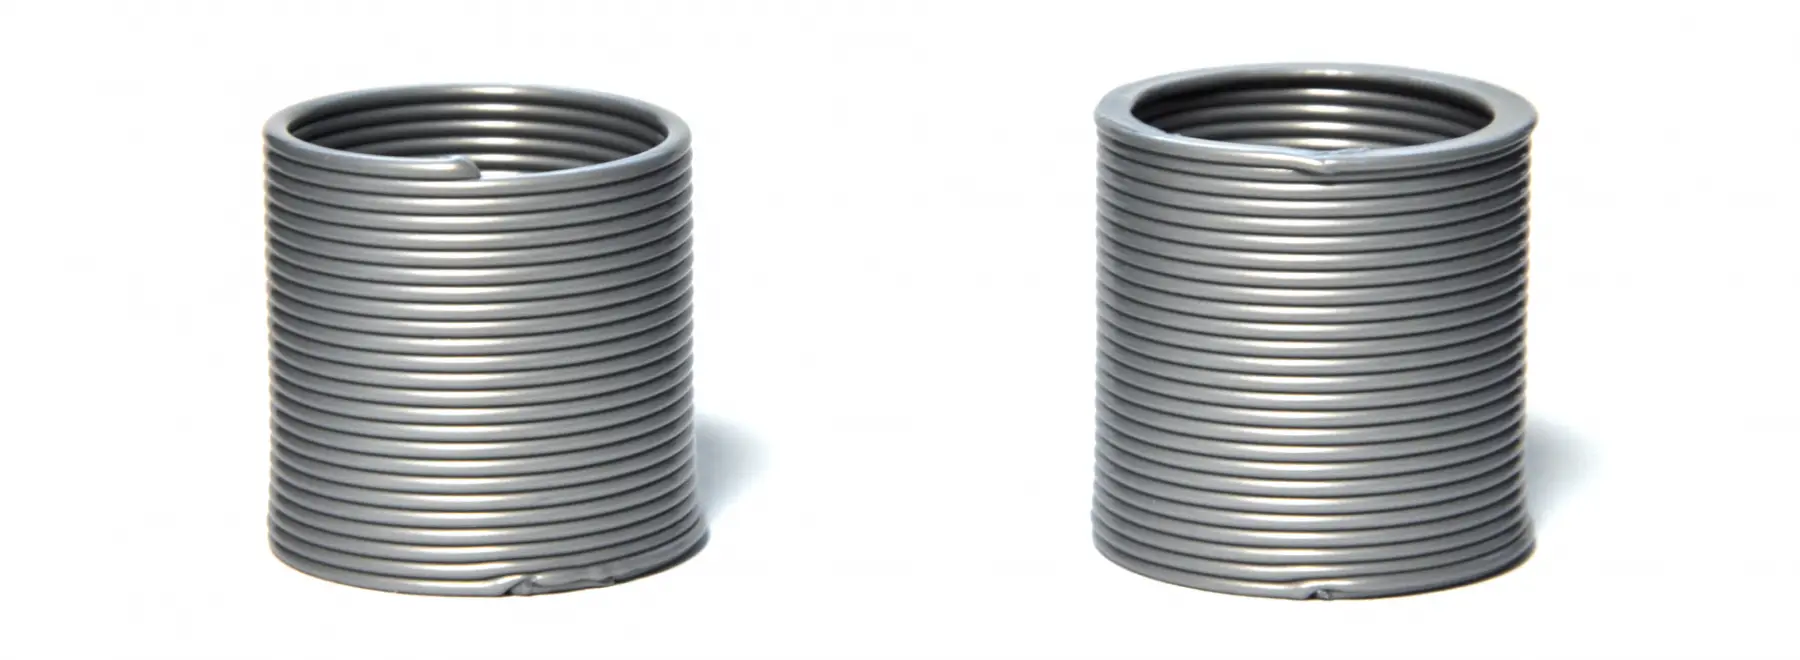
Left: PrusaSlicer Right: Cura
Print Settings
Nozzle Diameter: 1.8mm
Line Width: 2.0mm
Layer Height: 1.2mm
Printing Object: 30mm × 30mm × 30mm(h) Cylinder
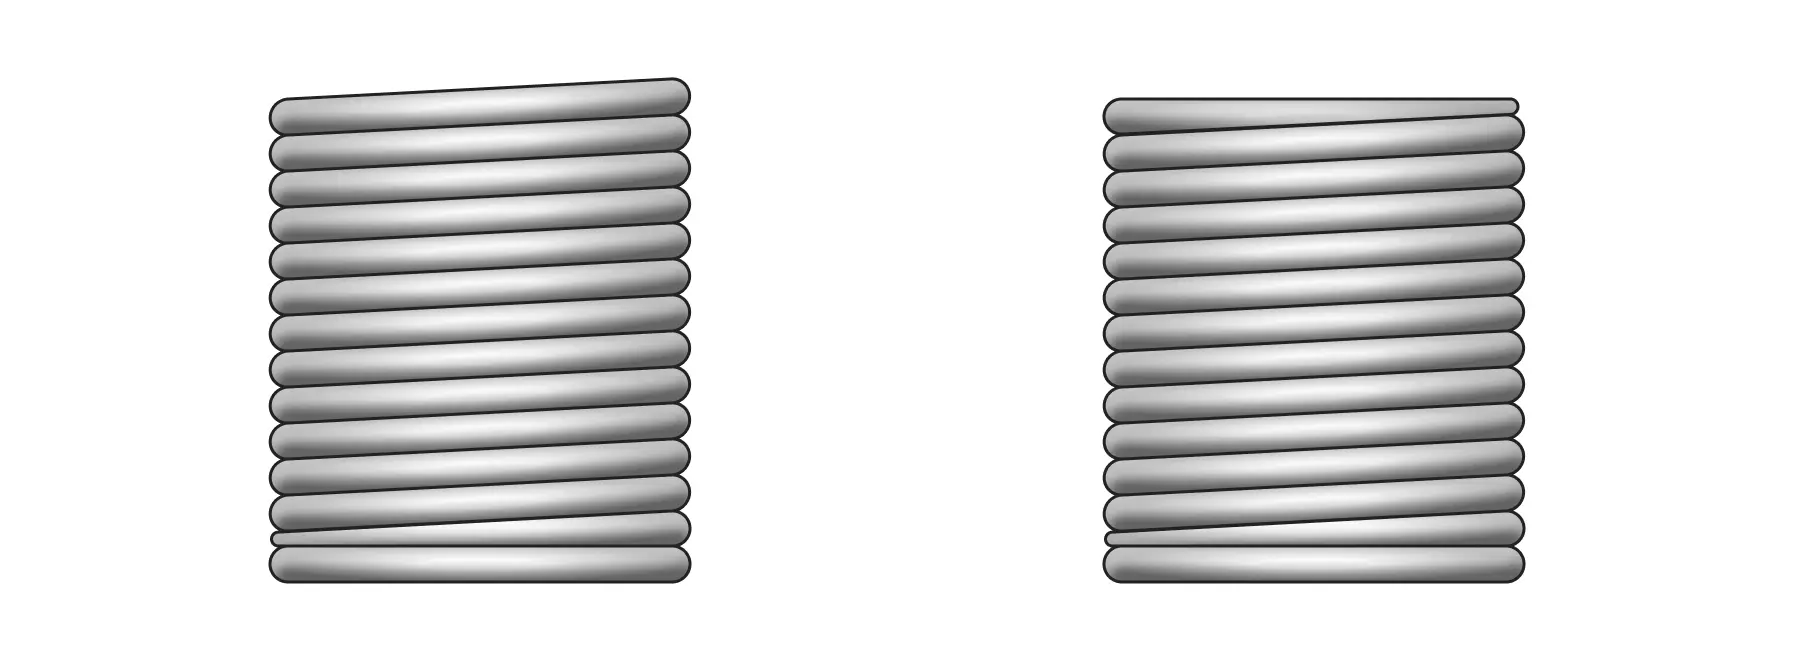
Left: PrusaSlicer Right: Cura
한계점 1: 모든 레이어에서 동일한 유량으로 프린팅
나선형의 단일 연속선을 레이어 높이로 나누었을 때, 첫번째 레이어와 마지막 레이어의 유량은 이전 레이어(첫번째 레이어의 경우 베드 플레이트)의 높이와 노즐의 높이에 따라 조절되어야 한다. 그러나 두 슬라이서 모두 일반적인 레이어 높이에서의 유량으로 모든 구간에서 프린팅하므로 외곽선이 돌출하는 문제가 발생한다다.
한계점 2: 두번째 레이어부터 시작되는 나선형의 단일 연속선
두 슬라이서 모두 베드 플레이트와의 충돌을 방지하기 위해 첫번째 레이어는 심이 생성되는 일정한 높이의 적층형 구조로 만들어진다. 이 방식은 하단 솔리드 레이어를 만들 경우 필연적으로 사용되지만, 하단 솔리드 레이어가 없는 경우 이는 심이 만들어지게하며 연속적인 적층 형상에 이질감을 준다.
한계점3: 나선형으로 끝나는 마지막 레이어(프루사 슬라이서 한정)
프루사 슬라이서의 지코드는 마지막 레이어의 연속선이 동일한 높이가 아닌 나선형으로 끝난다. 이는 모델링과 다른 형태임은 물론이고 첫번째 레이어와 마지막 레이어의 형상이 다르게 만들어진다. 반면 큐라의 경우 마지막 레이어의 연속선이 모두 동일한 높이로 이루어져있다.
Limitation 1: Printing with the Same Flow Rate Across All Layers
When dividing a single continuous spiral line into layer heights, the flow rate for the first and last layers should be adjusted according to the height of the previous layer (or the bed plate for the first layer) and the nozzle height. However, both slicers print all sections with the flow rate for a typical layer height, causing the outline to extrude.
Limitation 2: Spiral Continuous Line Starting from the Second Layer
Both slicers create the first layer as a stacked structure of uniform height where the seam is generated to avoid collision with the bed plate. This method is necessarily used when creating a bottom solid layer, but in the absence of a bottom solid layer, it results in the formation of a seam and gives an inconsistent appearance to the continuous layered structure.
Limitation 3: Spiral Ending of the Last Layer (PrusaSlicer Specific)
In PrusaSlicer, the G-code makes the continuous line of the last layer end in a spiral rather than at the same height. This not only differs from the modeled shape but also creates a disparity in the appearance of the first and last layers. In contrast, Cura ensures that the continuous line of the last layer is at the same height, providing a uniform finish.
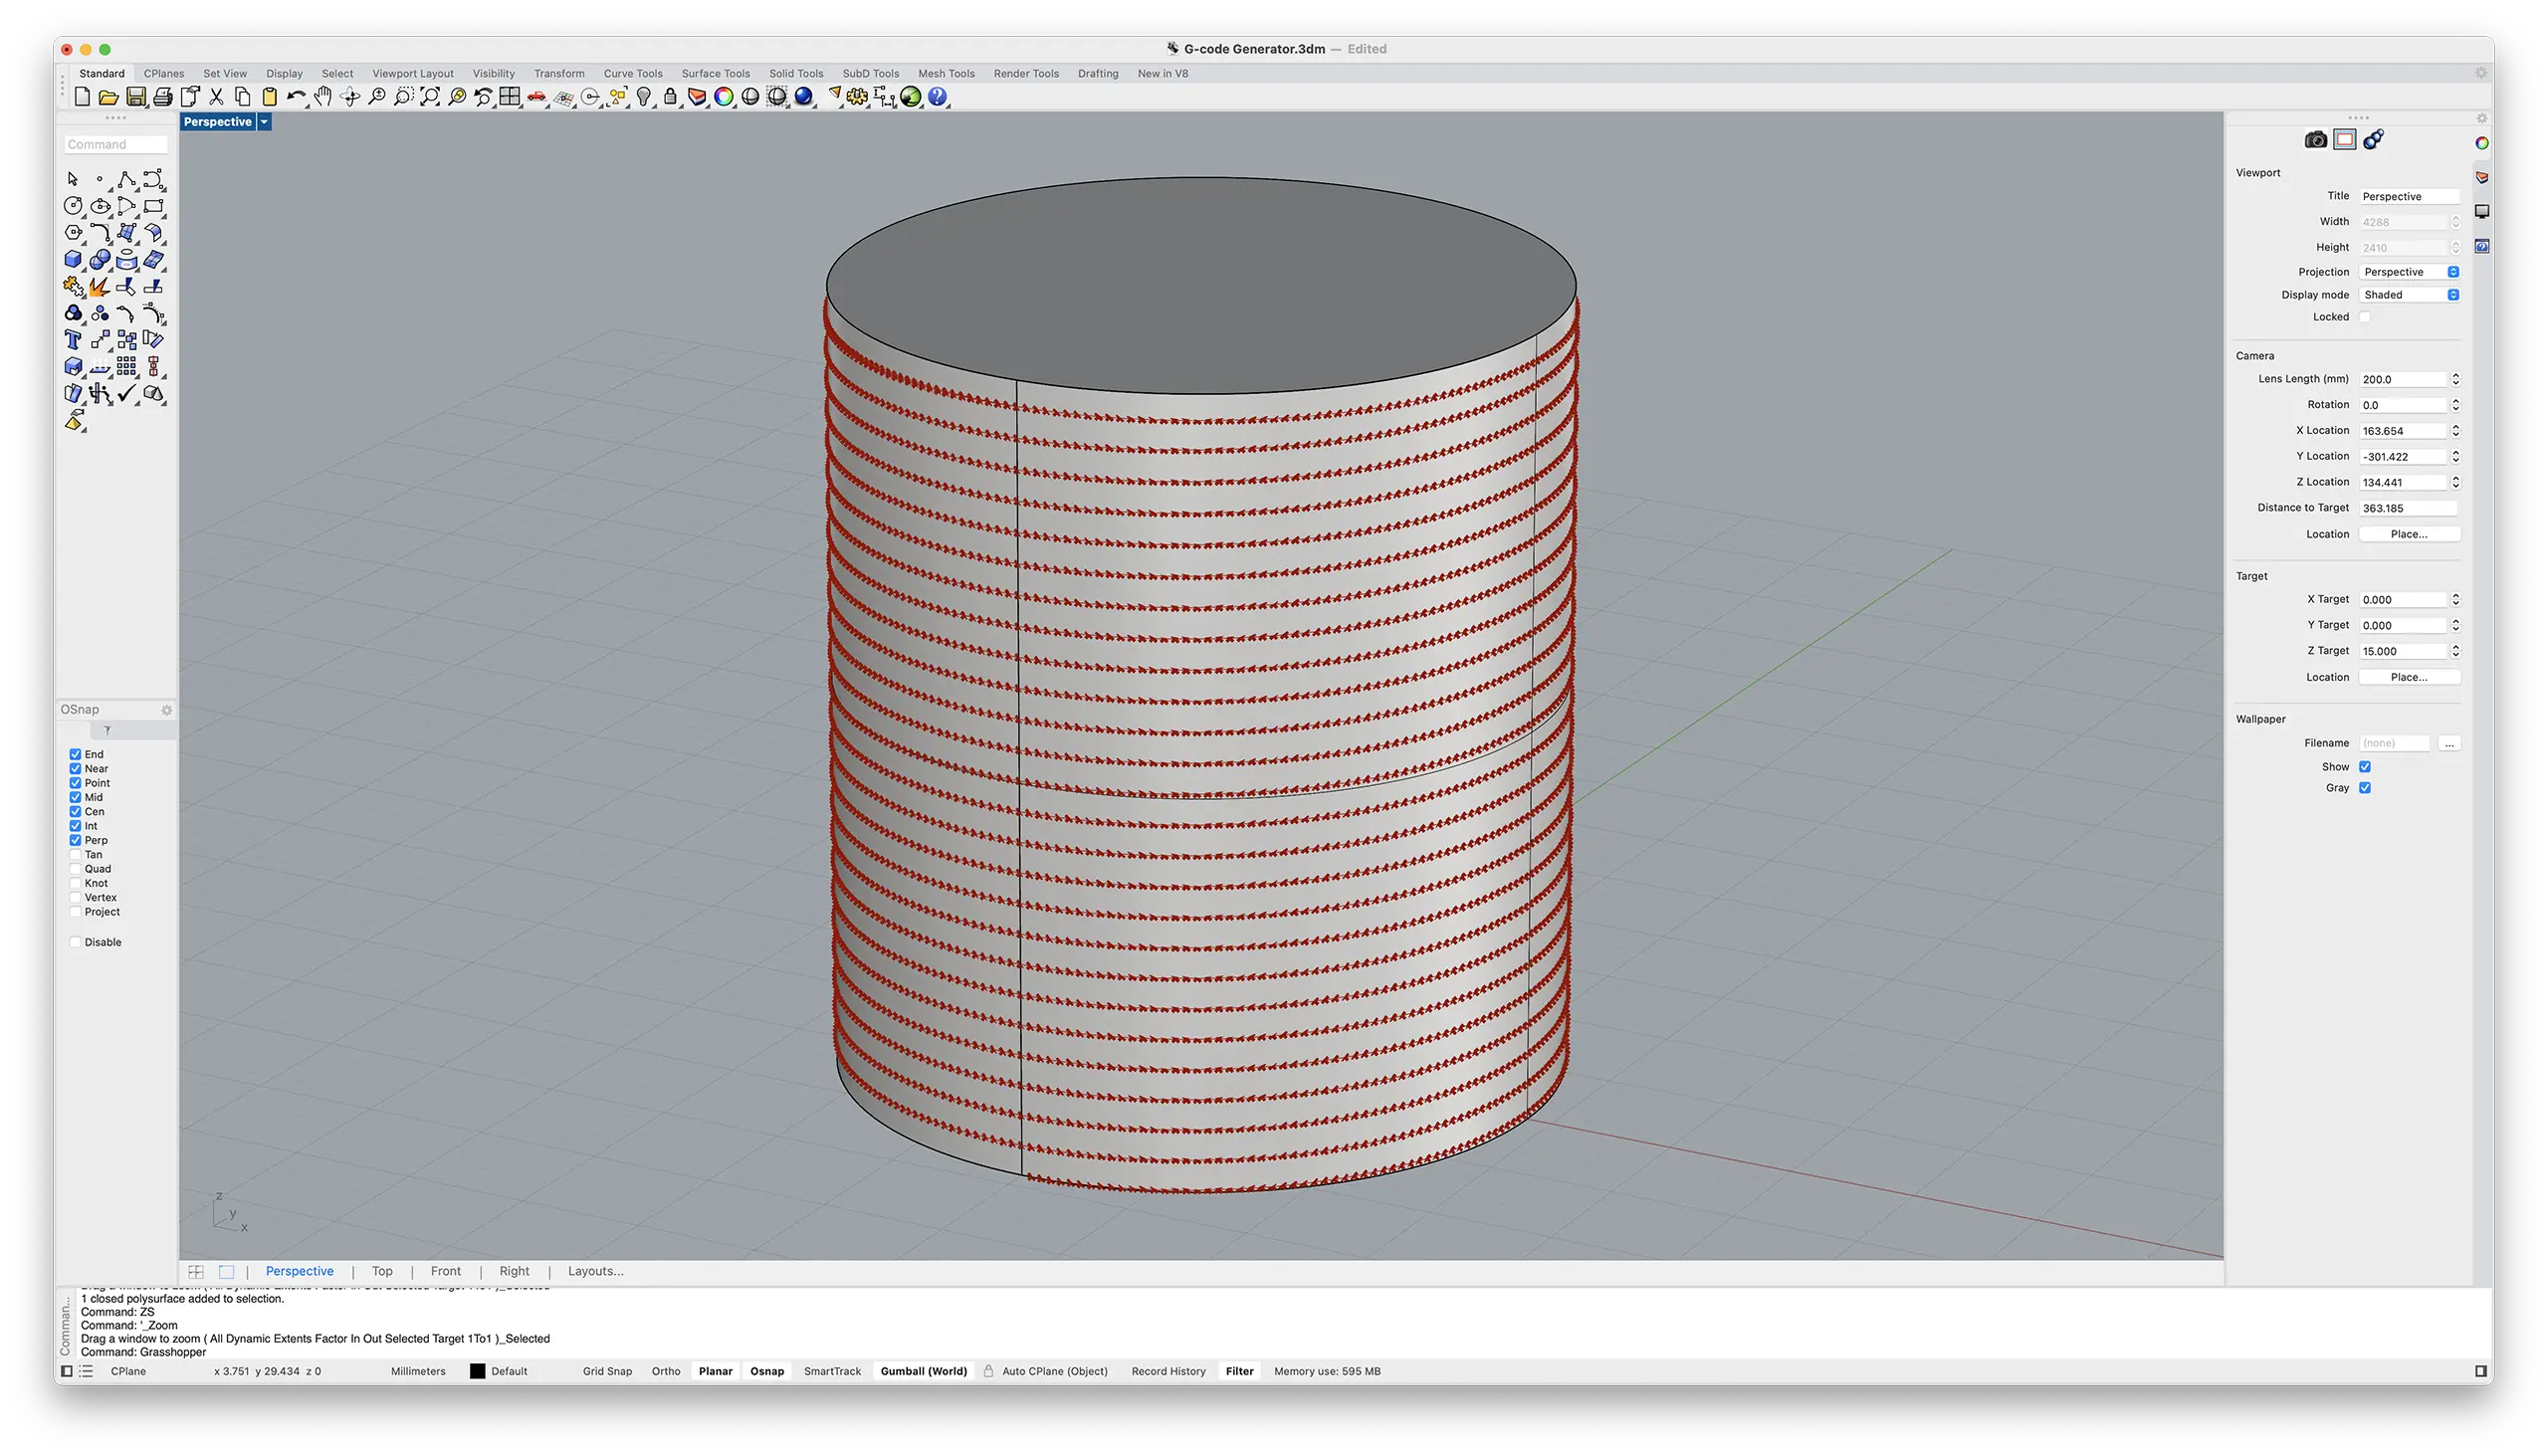
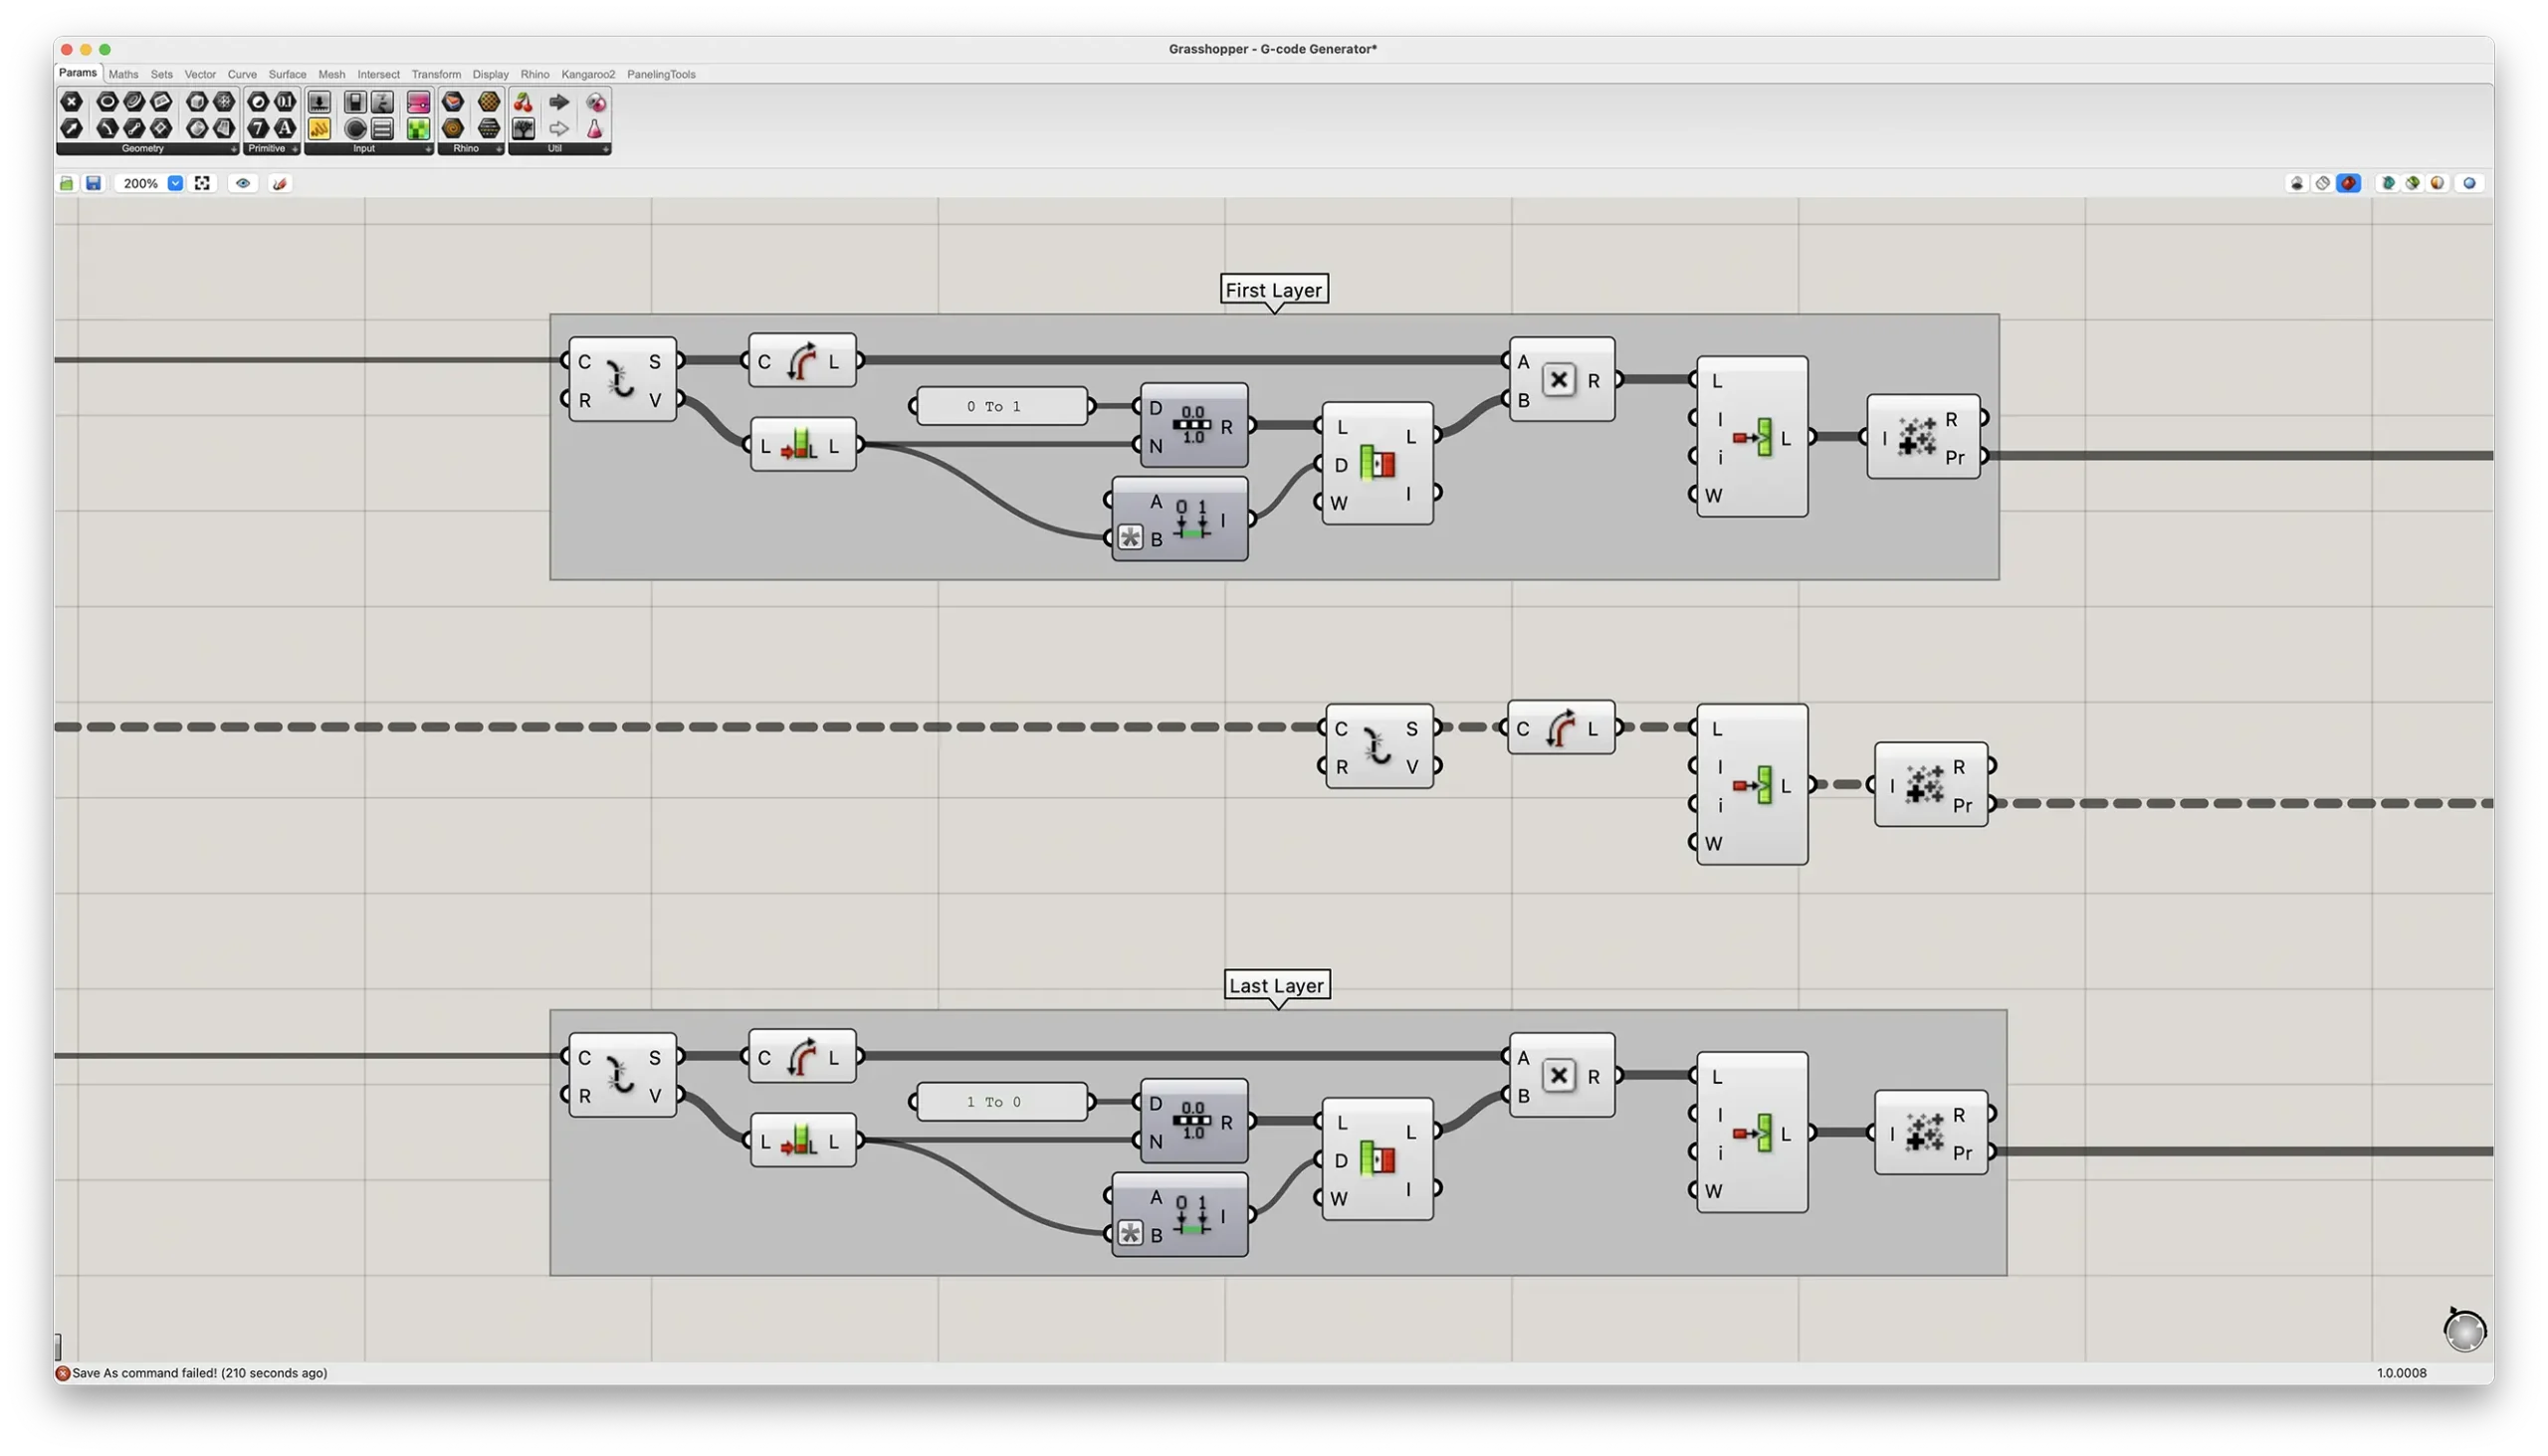
위 한계점을 해결하기 위해 나선형의 단일 연속선의 첫 레이어와 마지막 레이어의 Z축 높이와 유량을 조절하였다. 첫 레이어는 Z0 높이에서 점차 유량이 늘어나며 나선형의 단일 연속선이 시작하게 만들었고, 마지막 레이어는 동일한 Z축 높이에서 유량이 점차 줄어들도록 만들었다. 이에 대한 결과물과 비교사진은 아래와 같다.
To address the above limitations, the Z-axis height and flow rate of the first and last layers of the spiral continuous line were adjusted. The first layer starts with a gradually increasing flow rate from a Z height of 0mm, initiating the spiral continuous line. For the last layer, the flow rate gradually decreases while maintaining the same Z-axis height. The results and comparison photos are shown below.
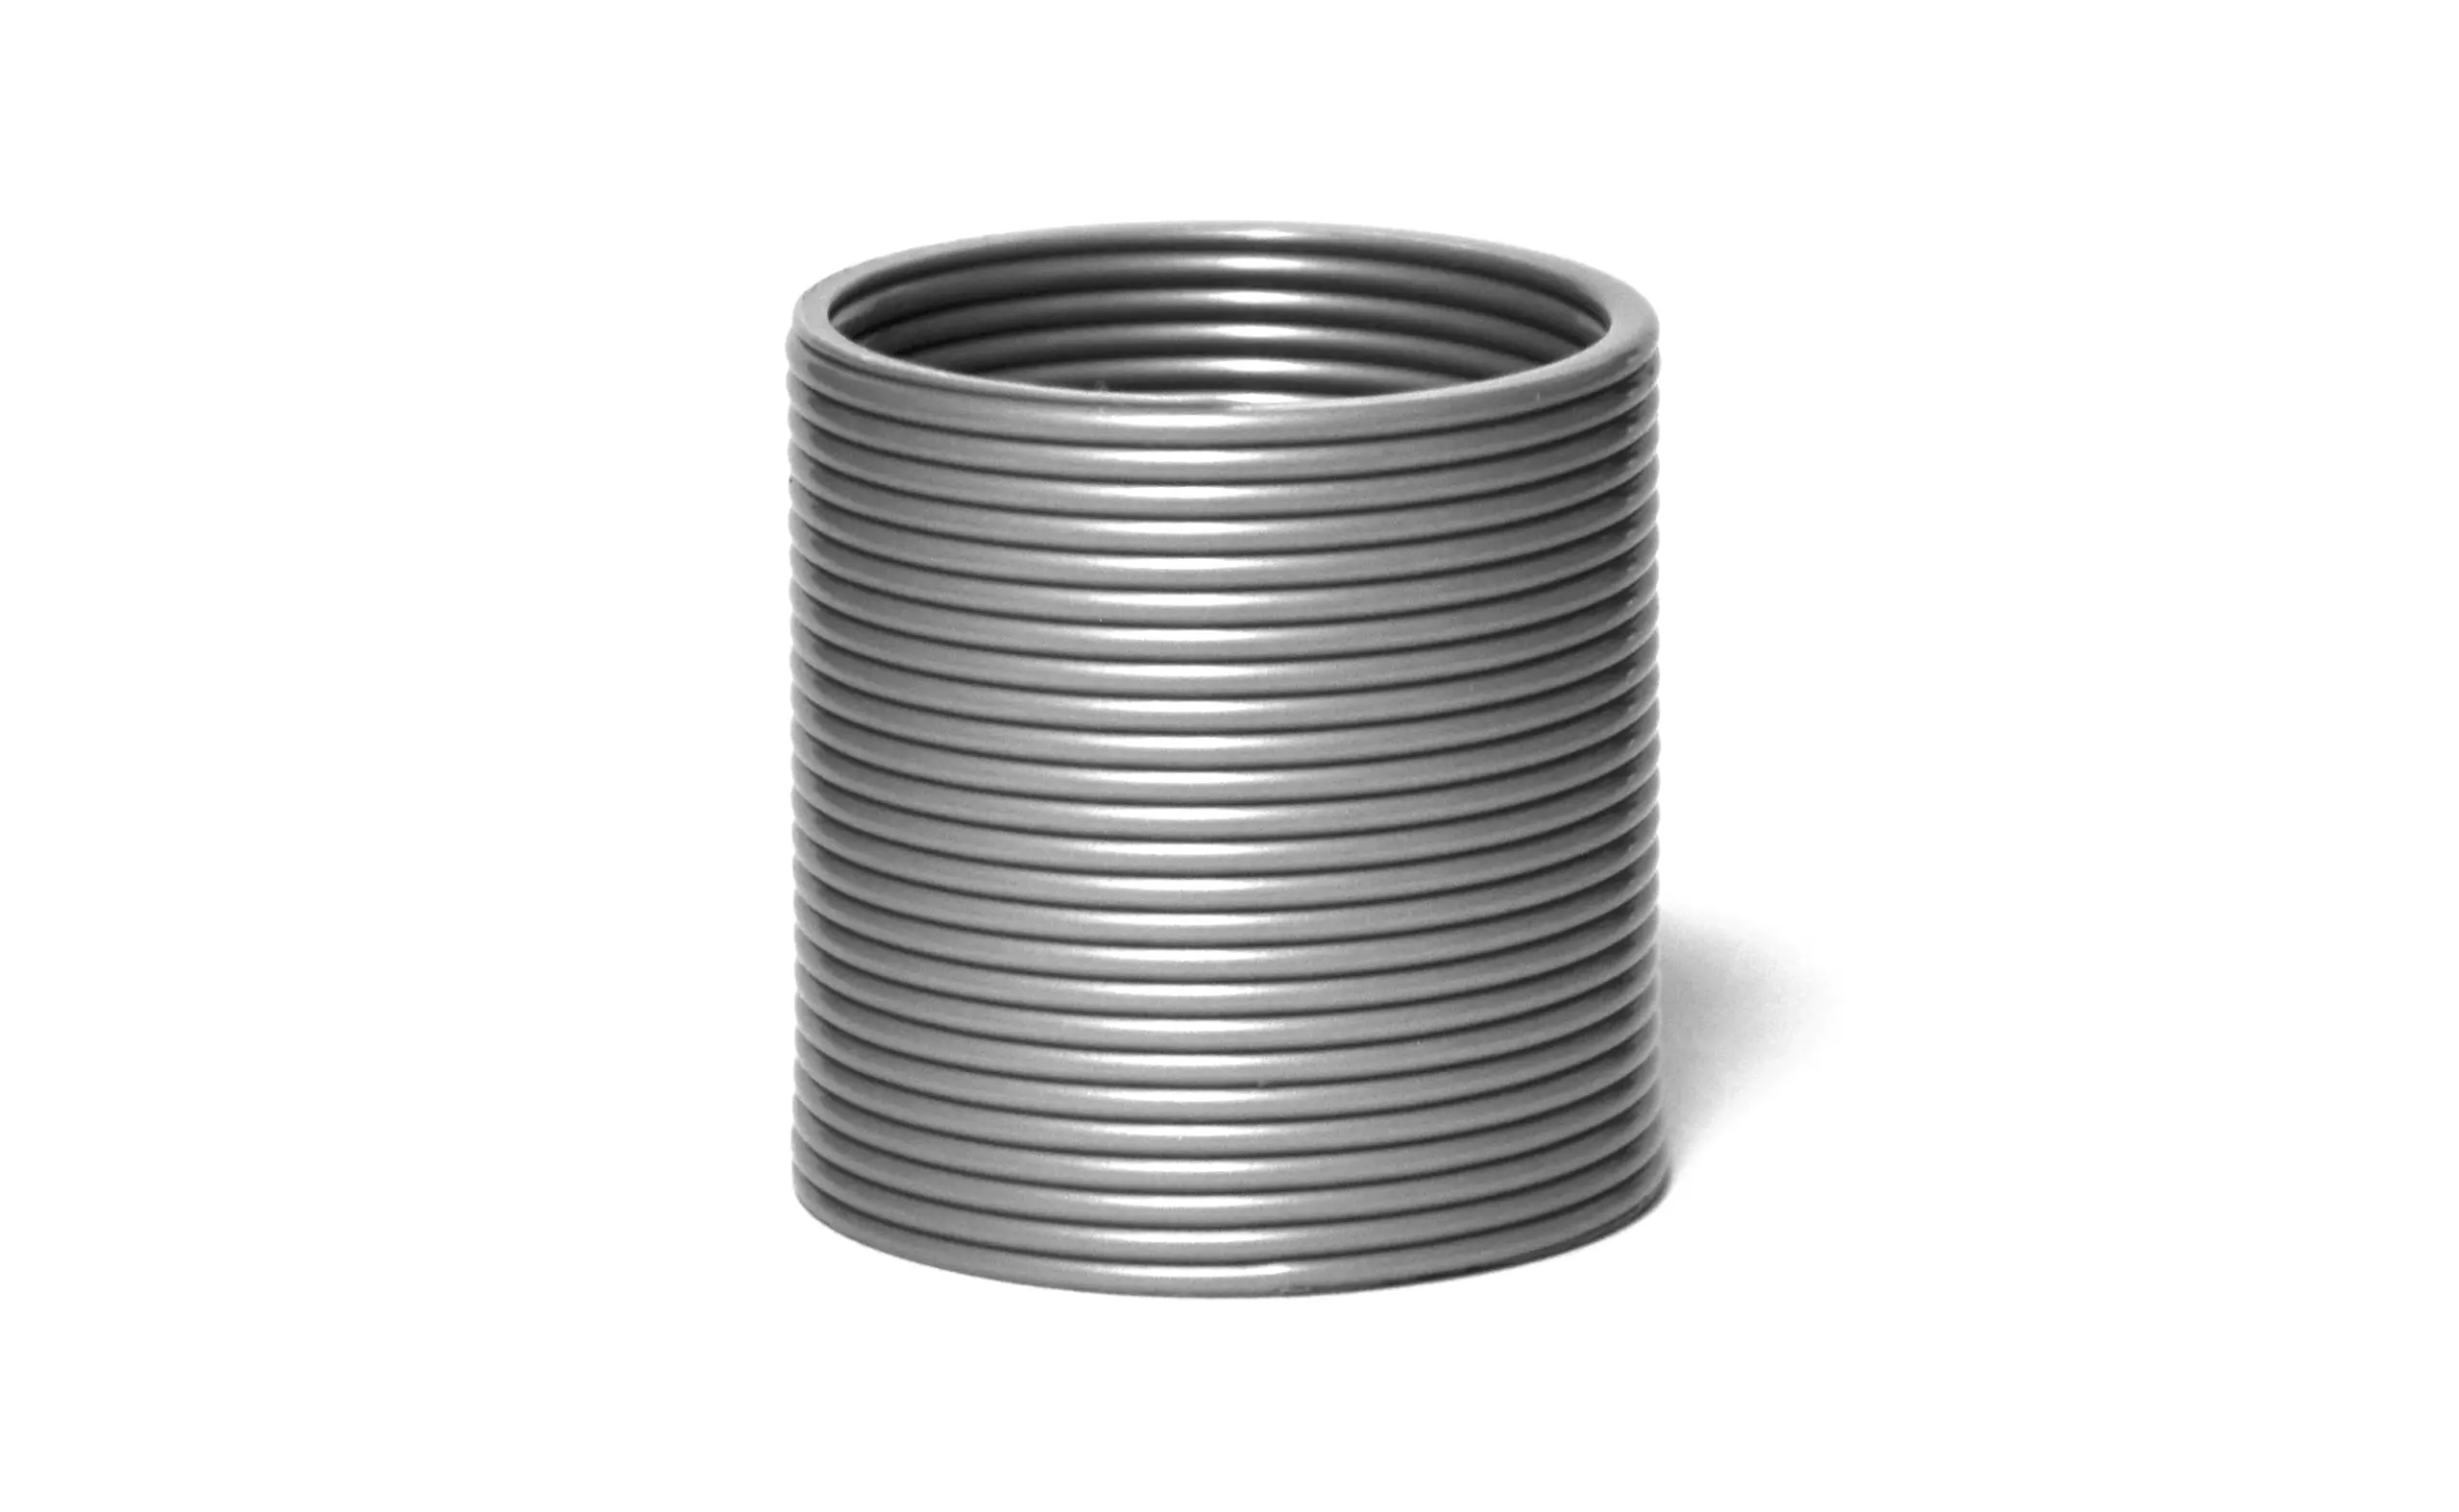
Perfect Spiral
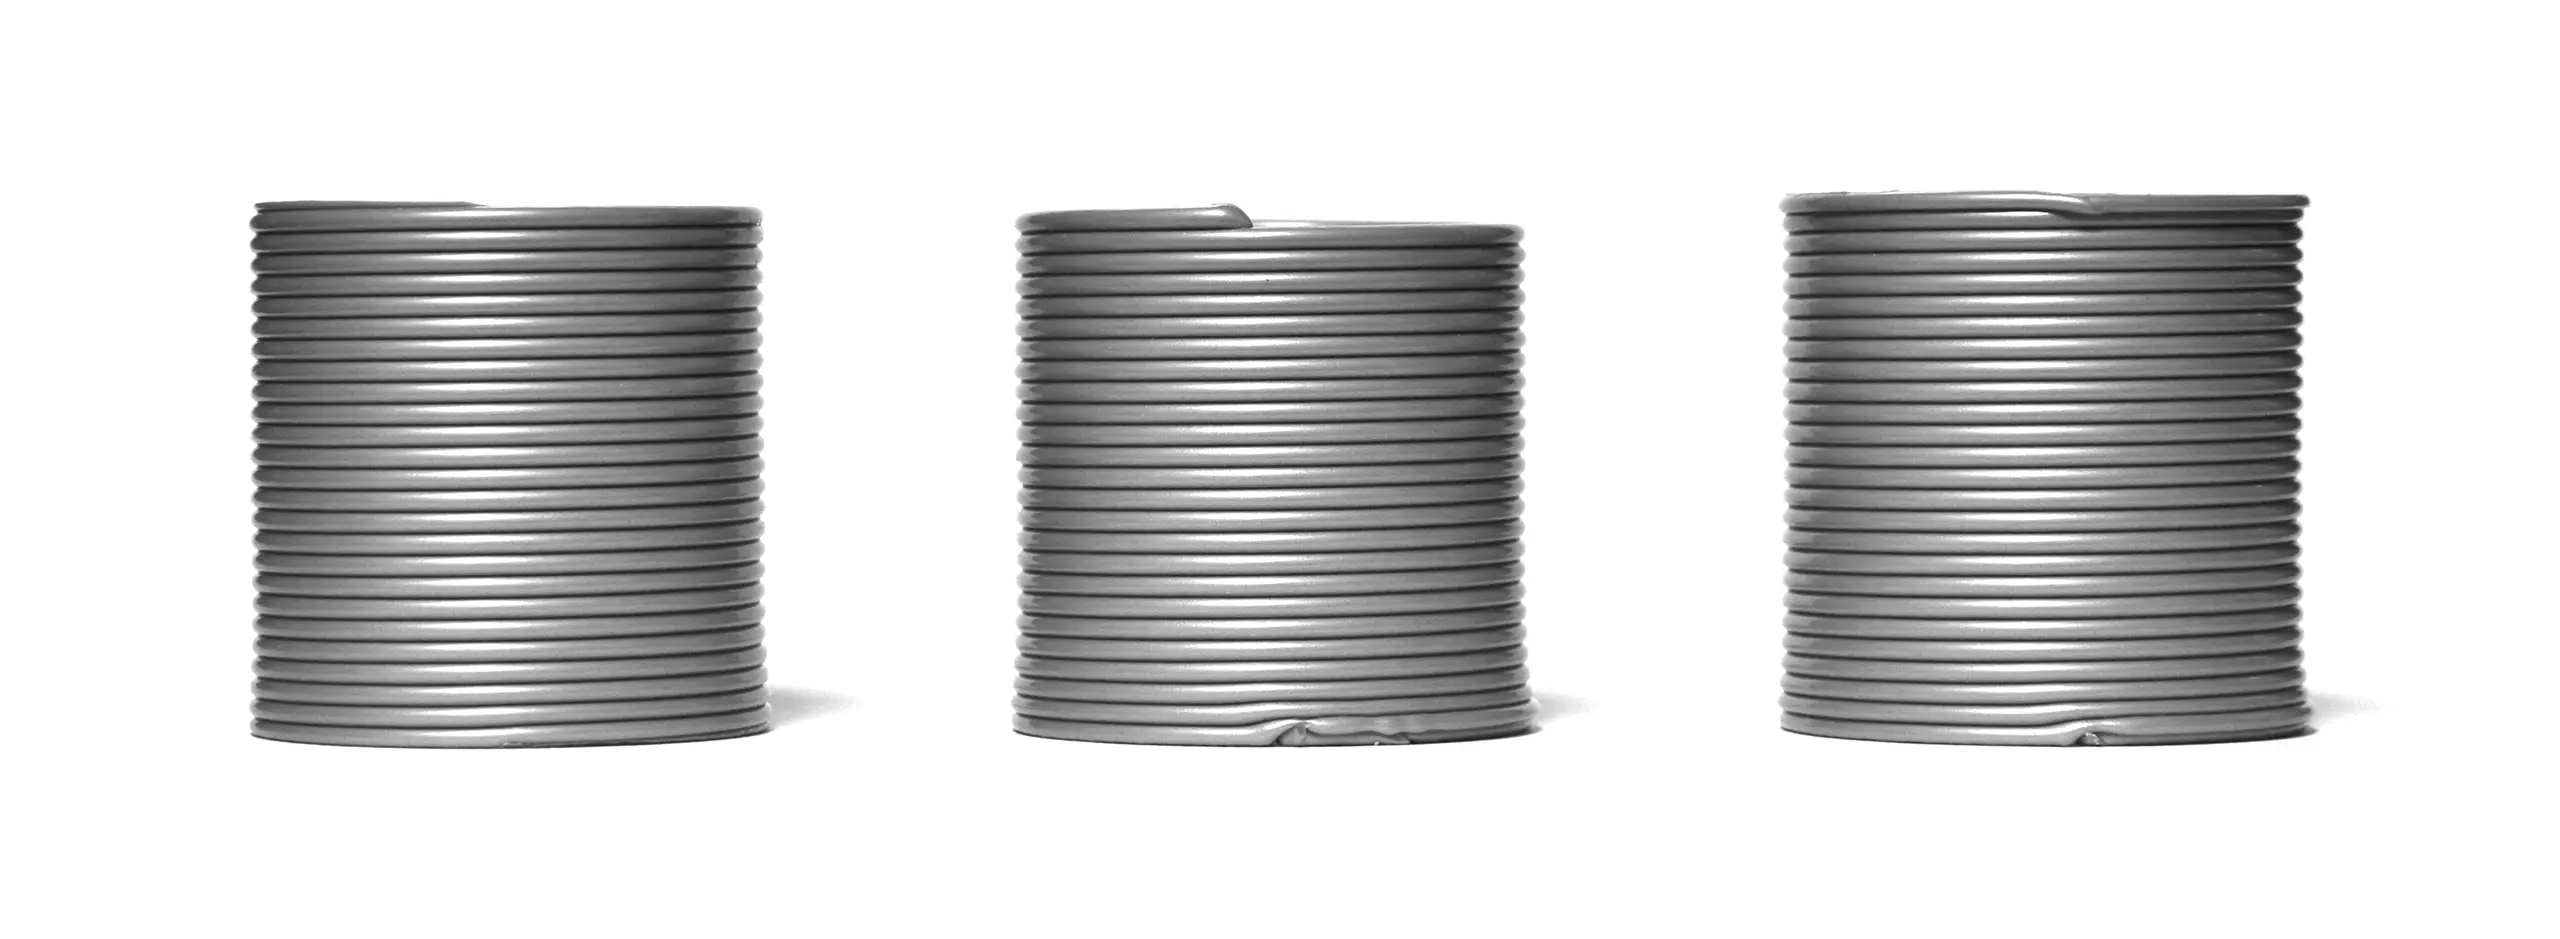
Left: Custom G-Code Center: PrusaSlicer Right: Cura
Print Settings
Nozzle Diameter: 1.8mm
Line Width: 2.0mm
Layer Height: 1.2mm
Printing Object: 30mm × 30mm × 30mm(h) Cylinder